 |
 |
|
|
|||||||


| PSP Zone All about Sony Playstation Portable : Games , applications , Themes , SKins and support & Tutorial s for all PSP problems |
|
|
Thread Tools | Display Modes |
|
|
|
|
|
|||||||
| PSP Zone All about Sony Playstation Portable : Games , applications , Themes , SKins and support & Tutorial s for all PSP problems |
|
|
Thread Tools | Display Modes |
|
#1
 07-12-2008, 03:29 PM
|
||||
|
||||
 How to Make your own PSP themes
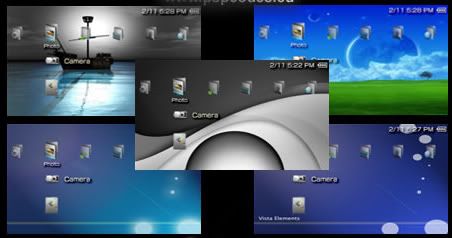 Here’s what you’ll be needing: * a computer that runs Windows * a digital image editing program * the “PSP Theme Toolbox” * a little bit of time First thing you need to do is download the “PSP Theme Toolbox” zipped file. You can unzip it anywhere, but if you’ll be doing a lot of Themes or want to use the pre-made default while going through this walkthrough, you’ll have to extract it directly to your C:\ drive (C:\PSP Theme Toolbox\).  [Only Registered users can see links . Click Here To Register...]PSP Theme Toolbox [Only Registered users can see links . Click Here To Register...] _____________________ In the “Toolbox”, you’ll find: * Icons and Wallpaper templates * “PSP Custom Theme Converter” program * Default Project saved as a “.txt” file * “How To” Basics and Advanced Walkthroughs * Layered PhotoShop template of icons * Unlike for PS3 Themes, there is an actual program so you won’t have to be worrying about XML code or funky compiler programs. * Open the program (PSPCustomThemeConverter.exe) and we’ll go though it, tab-by-tab. NOTE: If you’d like to see a working example of each item, go to “File\Open” and select “PSPTheme_default.txt”. This will only work if you’ve extracted the Toolbox to your C:\ drive because of the way the project file links to the associated images. The first tab is the “Information” Tab. * Put the name of your Theme or its description in the “Title” space. * The “Product ID” is where you assign what the Theme is associated to, e.g. Game, Anime, Movie, etc. * The “Version” is helpful if you want to do keep track of multiple versions of a Theme, but isn’t necessary either. The second tab is the “Wallpaper” Tab. * Wallpapers have to be: * 480 x 272 pixels * 24-bit Color Image * BMP files Click on the “Folder” button to browse and select any image that matches the required size and format. * * If the image you select is not useable, an “Error” window will pop-up letting you know what needs to change. * You can click the “Preview” button to preview your wallpaper once you’ve selected one that is workable. Next tab is called “Category Icons”, and is for the main XMB Icons. * These icons need to be: * either 64 x 48 pixels or 48 x 48 pixels * 8-bit Index (32-bit Color) * TGA, PNG, or GIM image files The “First Level Icons” Tab is for the icons that appear within a category on the XMB. * These are the sub-icons that appear below the category XMB icons. * Double click on the icon line or click the “Edit” button. * You’ll see a request for two files: the “Icon Body” and the “Icon Focus”. The “Body” is the actual icon. * The “Focus” is the glow that pulses around the icon when you highlight that icon. If you’d like to keep things simple, or not worry about having a pulsing glow around your selection, you can either use the default focus image or leave that space blank. * The icons need to be: * 32 x 32 pixels (Body) * 48 x 48 pixels (Focus) * 8-bit Index (32-bit Color) * TGA, PNG, or GIM image files The “Second Level Icons” tab is for the “Settings” Icon. That’s right; the “Settings” wrench gets its very own tab! * Just like the First Level Icons, these need to be: * 32 x 32 pixels * 8-bit Index (32-bit Color) * TGA, PNG, or GIM image files Its focus needs to be: * * 48 x 48 pixels * 8-bit Index (32-bit Color) * TGA, PNG, or GIM image files The last tab is “Others”. * The “Preview Icon” is the tiny thumbnail that appears when you choose your Theme, and needs to be: * 16 x 16 pixels * 8-bit Index (32-bit Color) * TGA, PNG, or GIM image files The “Preview Image” is the preview for the Theme, and needs to be: * * 300 x 170 * 24-bit Color Image * BMP The final option is “Theme Color”. Here, you can assign a particular highlight colour to your Theme, or have it change monthly automatically. * _____________________ Once you’ve assigned all of the Icons to your images, go to “FILE” and select “EXPORT”. * Name your file, click “SAVE”, and the program will create your PSP Theme File (.PTF). * With your PSP connected to your computer in USB Mode or with a compatible Memory Stick connected, place the file into the proper “Theme” folder ( \PSP\THEME ). * Disconnect your PSP or insert the Memory Stick in to your PSP. * Under “Settings”, select “Theme Settings”, and then “Theme”. |
| Bookmarks |
| Tags |
| psp themes, themes for psp |
|
|


 Linear Mode

